Making Witchy Accessories Step by Step: A Crafter's Guide
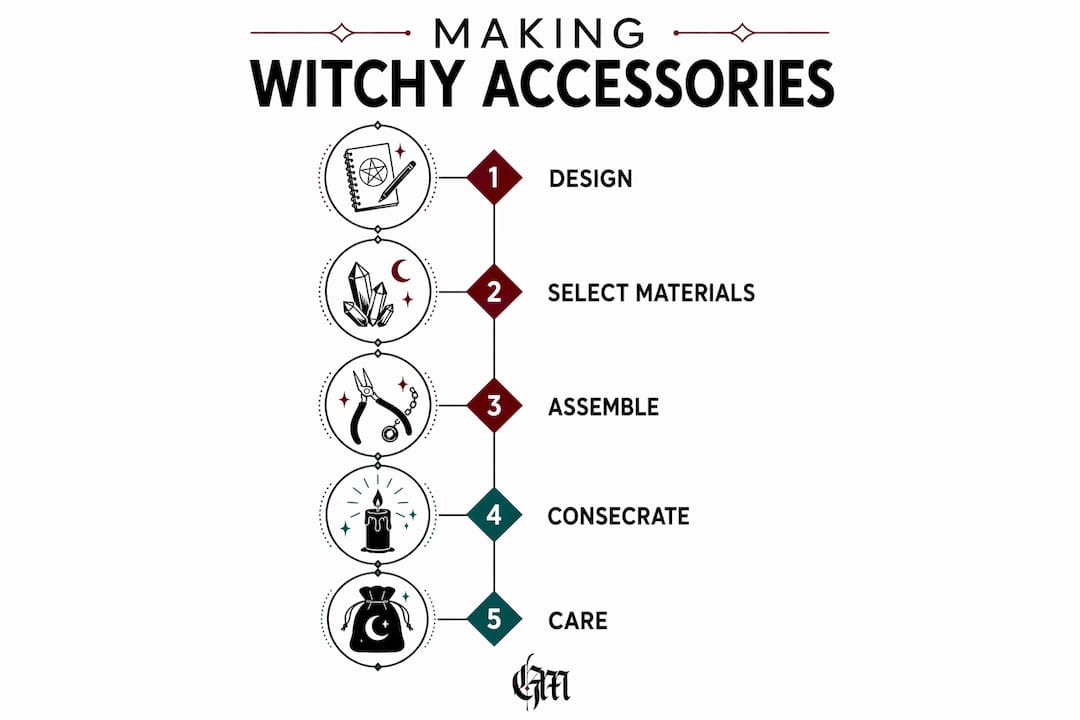
Making witchy accessories step by step starts with three non-negotiable decisions: what materials you build from, how you assemble the piece, and how you close the process with ritual intention. Get all three right, and you end up with something that holds together physically and carries genuine meaning. Skip any one of them, and you have either a fragile craft project or a pretty object with no soul. Here is the full roadmap before you pick up a single tool.
What you need before you start:
- Base metals: stainless steel, titanium, or gold-filled wire and findings
- Protective gemstones: black tourmaline, amethyst, or labradorite cabochons
- Tools: round-nose pliers, flat-nose pliers, wire cutters, crimping tool
- Findings: jump rings, lobster claw or toggle clasps, crimp beads, head pins
- Embellishments: dried herbs, resin, bezel settings, symbolic charms
- Finishing supplies: polishing cloth, anti-tarnish solution, clear protective coating
- Ritual supplies: white sage or palo santo, magical oil, a bowl of sea salt
Sketch your design on paper before touching materials. Experiment with symbol placement, color themes, and proportions until the layout feels right. That planning step prevents wasted wire and second-guessing mid-assembly.
Table of Contents
- What materials actually hold up in witchy jewelry?
- How to assemble witchy accessories so they actually stay together
- How consecration turns a handmade piece into a true magical tool
- Personalizing your pieces with symbols, color, and care
- Key Takeaways
What materials actually hold up in witchy jewelry?
The single biggest mistake in DIY witchcraft jewelry is choosing base metals for looks rather than longevity. Stainless steel, titanium, and gold-filled metals outlast plated options by years because the metal layer goes all the way through rather than sitting on the surface. Plating wears off within months of daily contact with skin oils and moisture.
For anyone with sensitive skin, surgical stainless steel and titanium are the safest choices. Both resist rust and prevent the irritation that nickel-heavy alloys cause. Gold-filled wire costs more than plated, but the appearance stays consistent far longer.
Gemstone and symbolic component checklist:
- Black tourmaline: widely used for shielding; works well as a raw chunk wired into a pendant or as a polished cabochon in a bezel setting
- Amethyst: pairs naturally with silver-toned metals; available in faceted beads, points, and flat slices for resin work
- Labradorite: its flash catches light dramatically; best set in a bezel to protect the stone’s edges
- Hamsa and evil eye charms: culturally significant protective symbols with centuries of use across multiple traditions; available as pre-cast findings or hand-stamped metal blanks
- Dried herbs: lavender, rosemary, and mugwort can be sealed inside resin pendants; use food-grade silicone molds and UV resin for clarity
- Pentagram and moon phase charms: core motifs in the witchy motifs catalog for 2026 style
| Component | Best option | Why it lasts |
|---|---|---|
| Base metal | Stainless steel or titanium | Rust-resistant, hypoallergenic, holds shape |
| Metal finish | Gold-filled | Layered metal, not surface coating |
| Gemstone setting | Bezel or prong | Protects stone from impact |
| Wire gauge suitable for structure | Holds wraps without snapping | |
| Clasp type | Lobster claw or toggle | Secure, easy to open one-handed |
Safety note: when cutting wire or filing metal edges, wear safety glasses. Fine metal shavings are invisible and dangerous near eyes. Work on a tray to catch small components, and keep sharp tools pointed away from your body when applying pressure.
How to assemble witchy accessories so they actually stay together
Assembly quality separates a piece you wear for years from one that falls apart the first week. Professional beaders consistently point to secure jump rings and crimps as the dividing line between retail-grade occult jewelry and fragile hobby work. The technique is not complicated, but it requires the right tools and deliberate attention.
Core assembly steps:
- Open jump rings sideways (twist one end toward you, one away) rather than pulling them apart. Pulling distorts the circle and creates a gap that never fully closes.
- Use two pairs of flat-nose pliers for control. One holds, one twists. Fingers alone cannot close a jump ring tightly enough to prevent slippage.
- For beaded strands, thread crimp beads onto beading wire, loop through the clasp, feed the wire back through the crimp, and flatten with a crimping tool. Use multiple crimp beads for security
- Wire wrapping around a gemstone starts with a straight length of 20-gauge wire. Wrap multiple coils above and below the stone’s girdle, then spiral the excess into a decorative loop at the top. This technique holds stones without glue.
- Smooth all edges with a needle file before the piece touches skin. Any burr or sharp point will snag fabric and scratch the wearer.
- Distribute weight evenly across the piece. A pendant that is heavier on one side will rotate and sit crooked. Add a counterweight bead or reposition the bail.
Pro Tip: Before closing the final jump ring on a finished necklace, hang the piece vertically and check that it drapes straight. Adjust the bail position while you still can.
Polish the finished piece with a soft cloth before any ritual work. A clean surface accepts oil anointing more evenly and looks better under any light.
How consecration turns a handmade piece into a true magical tool
Craftsmanship gets the piece built. Consecration is what makes it yours. According to Witchcraft For Beginners contributors, moonlight charging and anointing with magical oils are the two most widely practiced methods for awakening the spiritual power of a handmade accessory. Without this step, even a beautifully made piece functions as decoration rather than a talisman.
Consecration process, in order:
- Cleanse first: smudge the piece with sage smoke, pass it through salt water, or bury it in dry sea salt overnight. This clears any residual energy from the crafting process and the materials’ prior handling.
- Set your intention: hold the piece in both hands and state clearly what you want it to do. Protection, clarity, attraction, grounding. Spoken affirmations work; written ones placed under the piece during charging work equally well.
- Charge under moonlight: place the piece on a windowsill or outdoors during a full moon. The full moon is the standard charging window, though practitioners working with waning energy use the dark moon instead.
- Anoint with oil: a single drop of protective oil (black pepper, frankincense, or vetiver are traditional choices) applied to the piece while repeating your intention seals the consecration.
- Final breath: breathe on the piece three times. This is a simple act that many traditions use to mark the moment the object becomes a personal tool rather than a generic object.
Intention setting during creation is what separates authentic magical tools from costume accessories. You can recognize the difference in how a piece feels to wear. A consecrated talisman carries a weight of purpose that a purely decorative item does not.
Personalizing your pieces with symbols, color, and care
Goth’s guide to witchy motifs for 2026 highlights moon phases, serpents, ravens, and triple goddess symbols as the strongest current design directions. Each carries specific meaning: the waxing moon for growth, the raven for transformation, the serpent for wisdom and cyclical renewal. Choosing symbols that align with your actual practice rather than just current trends gives a piece staying power.
Color matters more than most DIY guides acknowledge. Black wire or chain grounds a piece visually and connects to protection and banishing work. Deep purple cord or beads amplify amethyst’s energy in a piece. Silver tones pair with moon-related intentions; gold with solar and abundance work. You can explore the full 2026 witchy fashion context to see how these color choices translate across a complete look.
For incorporating crystals into resin pendants, always seal dried herbs completely before pouring resin. Exposed plant material absorbs moisture and discolors within weeks. UV resin cures faster than two-part epoxy and produces fewer bubbles, making it the better choice for small pendant work. A gothic velvet choker paired with a handmade crystal pendant is one of the most effective ways to see how professional finishing and material choice work together in a complete piece.
Store finished accessories away from direct sunlight and humidity. Metal tarnishes faster in bathrooms. A small anti-tarnish strip inside a sealed pouch keeps silver-toned pieces bright between wearings. Clean gemstones with a dry cloth rather than water, since many crystals are porous and absorb moisture.
Key Takeaways
Authentic witchy accessories require durable materials, secure assembly, and a final consecration ritual to carry both physical and spiritual integrity.
| Point | Details |
|---|---|
| Choose metal wisely | Stainless steel, titanium, and gold-filled metals outlast plated options for daily-wear pieces. |
| Secure every connection | Two crimp beads and properly closed jump rings prevent components from separating over time. |
| Consecrate before wearing | Moonlight charging and oil anointing transform a handmade piece into a personal talisman. |
| Match symbols to intent | Moon phases, ravens, and serpents each carry specific meaning; choose based on your practice, not just trends. |
| Store and maintain carefully | Anti-tarnish pouches and dry storage preserve both the metal and the piece’s energetic charge. |
Ready to see what professionally crafted witchy accessories look like before you build your own? Browse the full curated collection at Goth.Market for occult jewelry, gothic fashion, and witchcraft supplies from independent creators who take both the craft and the craft seriously.