

Ear Gauge Sizes: Quick Conversions and Safe Stretching
Ear gauge sizes run from 20G (commonly about a standard lobe piercing thickness) up through 00G (a larger size), then continue as explicit millimeter and fractional-inch measurements, such as sizes close to 7/16" and 1/2". The Association of Professional Piercers (APP) treats millimeters as the precision standard because gauge numbers are imprecise and vary by regional wire-gauge system. Before you go any further: always stretch a fully healed piercing, move up only one size at a time, and give your tissue real recovery time between stretches.
Common sizes at a glance:
Standard lobe piercings commonly start at sizes near 20G to 18G, which correspond roughly to small millimeter ranges, with initial stretches often beginning around 16G or 14G.
- 12G ≈ 2.0 mm
- 10G ≈ 2.4 mm
- 8G ≈ 3.2 mm
- 6G ≈ 4.0 mm
- 4G ≈ 5.0 mm
- 2G ≈ 6.0 mm
- 0G ≈ 8.0 mm
- 00G ≈ 10.0 mm
- 7/16" ≈ 11.0 mm
- 1/2" ≈ 12.7 mm
Key Takeaways
Millimeters are the only reliable standard for ear gauge sizing — gauge numbers are inverse, non-linear, and vary by regional wire-gauge system.
| Point | Details |
|---|---|
| Use millimeters, not gauge numbers | Gauge labels vary by system (AWG vs SWG); always verify the mm value on product pages. |
| Progress one size at a time | Wait at least 4–6 weeks for small stretches, and 2–3 months or longer at larger sizes. |
| Test metals before wearing | Use a DMG test kit to screen for free nickel and avoid allergic dermatitis. |
| Choose implant-grade materials | Titanium (ASTM F136), stainless steel (ASTM F138), solid 18–24k gold, and borosilicate glass are the safest options. |
| Goth for curated dark-aesthetic jewelry | Goth.Market lists plugs and tunnels from independent makers with explicit material specs for alternative and gothic styles. |
Table of Contents
- What does the full ear gauge size chart look like in mm and inches?
- How do you measure your piercing and jewelry accurately?
- What is the safest way to stretch your ears, and how long does it take?
- Which jewelry materials are safest for stretched ears?
- What are the most common stretching complications and how do you handle them?
- Why do gauge numbers and millimeters both exist, and which should you trust?
- What is the history and cultural significance of ear gauging?
- What types of ear gauges and jewelry styles are available?
- How do you choose the right initial gauge size for stretching?
- How do you downsize or remove ear gauges?
- What the gauge chart doesn’t tell you about stretching
- Curated plugs and tunnels for alternative aesthetics
- Sources
- FAQ
What does the full ear gauge size chart look like in mm and inches?
The table below covers the most-used sizes from a standard lobe piercing through large-gauge territory. Body jewelry sizing references confirm these conversions, though minor rounding differences exist between sources.
Above 00G, the gauge system simply stops. Sizes continue in millimeters or fractional inches depending on the vendor, which is why millimeter measurements are the only reliable cross-vendor standard.
A note on variation: Two common wire-gauge systems exist — American Wire Gauge (AWG), standard in the United States, and Standard Wire Gauge (SWG), used in some Canadian and UK products. The same numeric label can represent slightly different diameters depending on which system the manufacturer used. Always verify the explicit millimeter value on any product page, especially when ordering from international sellers.
To print a to-scale reference chart:
- Download or open a gauge chart PDF.
- Print at exactly 100% scale (disable “fit to page” in your printer settings).
- Hold a piece of jewelry directly against the printed circles to confirm the match.
- If the circles don’t align with your jewelry, reprint and recheck your print scale setting.
Accessibility alt text for gauge chart images: “Ear gauge size chart showing gauge numbers from 20G to 00G with corresponding millimeter and fractional-inch measurements, printed at 100% scale for direct jewelry comparison.”
How do you measure your piercing and jewelry accurately?
The most accurate tool is a digital caliper, which reads to 0.1 mm and removes all guesswork. A ruler or printable chart works as a backup, but only if you verify the print scale first. Consumer guides recommend digital calipers or printable 100%-scale charts for accurate measurement before any stretch.
Measuring jewelry:
- For a plug or tunnel, measure the wearable area — the section that actually sits inside the piercing — not the flare or lip.
- Place the caliper jaws on opposite sides of the wearable diameter and read the mm value.
- For a taper, measure the widest end (the end you’d be stretching toward).
- For a captive ring or segment ring, measure the inner diameter of the ring, not the wire gauge.
Measuring your fistula (the piercing channel):
- Never force a tool into the piercing to measure it. Instead, insert the smallest piece of jewelry that fits comfortably, then measure that jewelry.
- If you’re unsure whether you’re at 6G or 4G, try inserting a known-size piece gently. No resistance means you’re at or past that size.
Pro Tip: When measuring plugs versus tunnels, both should be measured at the wearable diameter. A tunnel’s hollow center doesn’t change the sizing — the outer wearable diameter is still what your tissue is holding.
If you’re consulting a piercer remotely, photograph your jewelry flat on a white surface next to a ruler, shot straight down from above. That single image gives a piercer everything needed to confirm your current size.
What is the safest way to stretch your ears, and how long does it take?
Stretch only when the piercing is fully healed and shows zero tenderness, discharge, or irritation. The APP’s guidance is direct: slow progression and appropriate jewelry choices prevent the most common injuries.
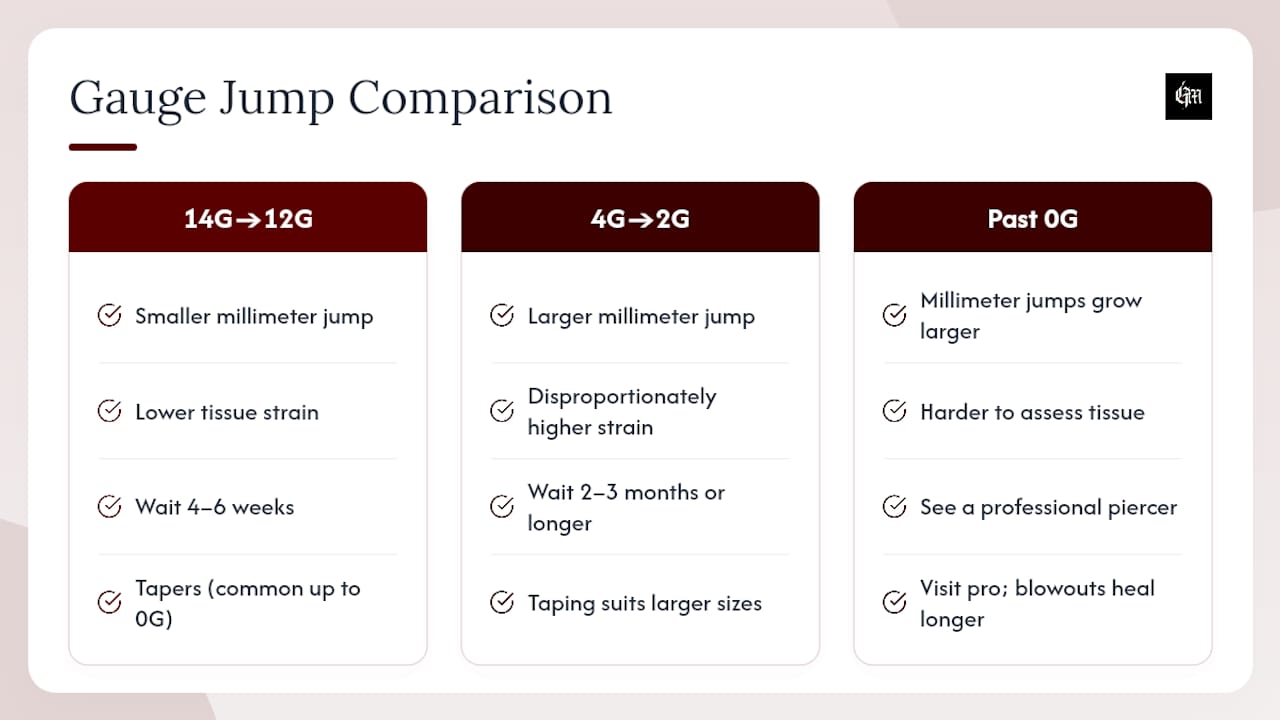
Timeline: Consumer guides suggest waiting at least 4–6 weeks between small stretches (14G to 12G, for example) and 2–3 months or longer at larger sizes. That longer wait isn’t arbitrary. The gauge system is non-linear: moving from 14G to 12G is a smaller millimeter jump than moving from 4G to 2G, so tissue strain grows disproportionately as diameters increase. Longer waits at bigger sizes aren’t overcaution — they’re basic tissue biology.
Methods compared:
Tapers are the most common tool for sizes up to about 0G. Insert slowly, never force, and swap to a plug immediately after — sleeping in a taper puts uneven pressure on the fistula wall.
Taping (wrapping PTFE or bondage tape around existing jewelry to add incremental thickness) suits larger sizes where single-step jumps become riskier. Add one layer at a time and wait for the tissue to adjust before adding another.
Dead stretching means inserting the next size without a taper, relying on warmed, lubricated tissue. It works at small sizes when the jump is genuinely minimal, but it’s easy to misjudge and force a stretch that isn’t ready.
Pro Tip: Past 0G (8 mm), consider visiting a professional piercer for each stretch. The millimeter jumps grow larger, the tissue is harder to assess yourself, and a blowout at that size takes significantly longer to heal than one at 14G.
Which jewelry materials are safest for stretched ears?
Implant-grade titanium, implant-grade stainless steel (ASTM F138), solid 18–24k gold, borosilicate glass, and certain body-safe plastics (implant-grade PTFE or acrylic) are the safest choices for healed stretches. DermNetNZ confirms that stainless steel, high-karat gold, and certain plastics are safer hypoallergenic options, while white gold and unknown alloys often contain enough nickel to trigger reactions.
Materials at a glance:
- Implant-grade titanium (ASTM F136): Lightest option, fully hypoallergenic, available anodized in multiple colors. Best choice for fresh or sensitive stretches.
- Implant-grade stainless steel (ASTM F138): Durable and affordable, but contains a small nickel fraction — most people tolerate it fine in healed tissue; avoid in actively healing stretches.
- Solid 18–24k gold: Excellent for healed lobes. Avoid gold-plated or gold-filled pieces, which shed their coating over time and expose base metals.
- Borosilicate glass: Non-porous, smooth, and easy to sterilize. Popular for healed large-gauge plugs.
- Organic materials (wood, bone, horn): Porous and not autoclavable. Use only in fully healed, healthy tissue, and never during a fresh stretch.
- Silicone: Flexible and comfortable for healed lobes, but silicone can harbor bacteria if scratched. Never stretch into silicone.
How to test jewelry for nickel with a DMG kit
Dermatology guidance recommends dimethylglyoxime (DMG) testing as a practical consumer method to detect free nickel and avoid allergic dermatitis.
- Purchase a DMG test kit (available at pharmacies and online).
- Apply one drop of the DMG solution to a cotton swab.
- Rub the swab firmly on the jewelry surface for about 30 seconds.
- A pink or red stain on the swab indicates free nickel is present.
- If the test is positive, do not use that piece for stretching or in a healing piercing.
Shopping tip: Look for explicit alloy designations on product pages — “ASTM F136 titanium” or “316L stainless steel” are real specs. “Surgical steel” alone is not a regulated term and tells you nothing about nickel content. For handmade pieces, contact the seller directly and ask for the alloy certificate or material source.
What are the most common stretching complications and how do you handle them?
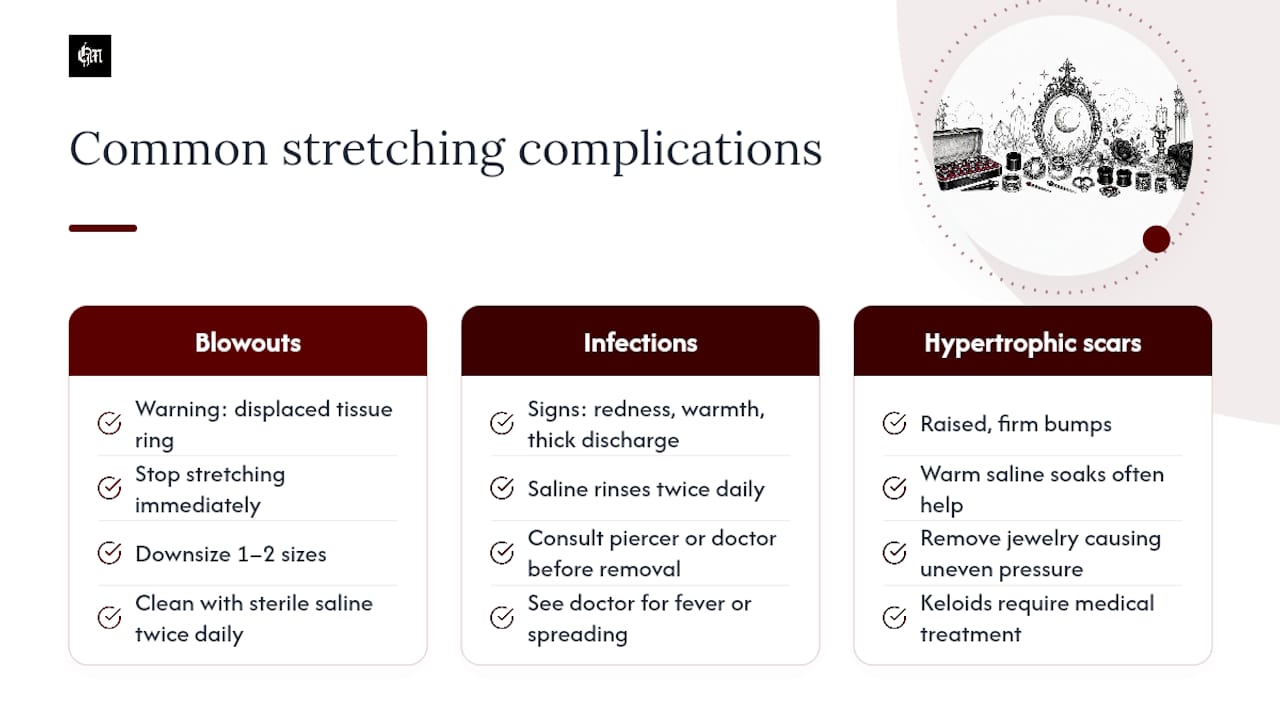
The three most common problems are blowouts, infections, and hypertrophic scarring. Early warning signs include pain during or after a stretch, unusual discharge (anything other than a small amount of clear fluid), persistent swelling that doesn’t resolve within a day or two, and a visible ring of displaced tissue at the back of the lobe — that last one is a blowout.
Blowouts happen when tissue is pushed backward through the fistula faster than it can adapt. Stop stretching immediately. Downsize one or two sizes to relieve pressure, clean the area with sterile saline twice daily, and apply warm compresses for 5–10 minutes to encourage circulation. Most minor blowouts resolve with rest and downsizing. A blowout that hardens into scar tissue or doesn’t improve in 2–3 weeks needs a piercer’s assessment.
Infections show as increasing redness, warmth, swelling, and thick or discolored discharge. Saline rinses twice daily are the first step. Do not remove jewelry from an infected piercing without consulting a piercer or doctor — removing it can trap the infection inside the tissue. If you develop fever, red streaking, or the infection spreads beyond the lobe, see a doctor promptly. Oral antibiotics may be needed.
Pro Tip: Hypertrophic scarring (raised, firm bumps near the piercing) often responds to warm saline soaks and removing any jewelry that puts uneven pressure on the site. Keloids — true overgrown scar tissue — require medical treatment and won’t resolve on their own.
Severe blowouts or repeated infections can cause permanent structural damage to the lobe. At that point, surgical revision by a plastic surgeon or experienced body-modification artist may be the only option to restore normal tissue.
Why do gauge numbers and millimeters both exist, and which should you trust?
Gauge numbers are counterintuitive: lower numbers mean thicker jewelry. A 2G plug is thicker than a 10G plug. That inverse relationship trips up almost everyone new to stretching, and it’s one reason millimeters are more reliable for planning a progression.
The deeper problem is that gauge numbers aren’t universal. Two historical wire-gauge systems are in common use: American Wire Gauge (AWG), the U.S. standard, and Standard Wire Gauge (SWG), which appears on some products from Canadian and UK manufacturers. The same numeric gauge label can represent different millimeter diameters depending on which system the manufacturer used. A 6G piece from a U.S. retailer and a 6G piece from a UK supplier may not be the same size.
Practical rules:
- Always check the millimeter value on a product listing, not just the gauge number.
- When in doubt, measure with a digital caliper rather than trusting a label.
- Past 00G, gauge labels disappear entirely — only millimeters and fractional inches remain.
- The millimeter jump between consecutive gauges grows larger as sizes increase, which is why the same one-size-up rule demands longer waits at bigger diameters.
What is the history and cultural significance of ear gauging?
Ear gauging is one of the oldest forms of body modification on record. The oldest known example is Ötzi the Iceman, a 5,300-year-old mummy discovered in the Alps with stretched ear lobes measuring approximately 7–11 mm. Ancient Egyptian mummies, including Tutankhamun, show evidence of stretched lobes. Across pre-Columbian Mesoamerica, large ear spools made of jade, obsidian, and gold were markers of social rank among the Maya and Aztec nobility — the Spanish term orejeras (ear spools) appears repeatedly in colonial records describing these ornaments.
In many Indigenous cultures of the Amazon basin, the Maasai of East Africa, and the Mursi and Surma peoples of Ethiopia, stretched lobes and lip plates carry specific social, spiritual, and identity meanings that vary by community. These practices are not interchangeable with Western body modification aesthetics, and treating them as purely decorative misses their cultural weight.
In the United States, ear gauging entered mainstream visibility through punk and hardcore music scenes in the 1970s and 1980s, then spread through the body-modification community in the 1990s. Today it sits comfortably within alternative, gothic, and dark-aesthetic subcultures as both a personal statement and a form of body art, with a dedicated community of practitioners who treat the craft with real technical seriousness.
What types of ear gauges and jewelry styles are available?
The range of jewelry styles for stretched ears is wider than most people expect when they start.
Plugs are solid cylinders that fill the lobe. They come in single-flare (one lip to keep them in place) and double-flare (lips on both ends, requiring a fully healed and flexible lobe to insert). Materials run from steel and titanium to glass, wood, stone, and resin.
Tunnels (also called eyelets) are hollow, letting light pass through the lobe. The hollow center makes them lighter than solid plugs of the same diameter, which matters at larger sizes. They’re available in the same material range as plugs.
Tapers are cone-shaped tools used to stretch, not to wear long-term. Some people wear them as jewelry at smaller sizes, but they put uneven pressure on the fistula if worn continuously.
Flesh tunnels with decorative faces add a design element to the front of a standard tunnel — common in gothic and alternative aesthetics, where skull motifs, occult symbols, and dark geometric patterns are popular choices.
Weights and hangers are worn in healed, larger-gauge lobes and use gravity to gradually elongate the tissue over time. They’re not a stretching method per se but a style choice for people who want a different silhouette.
For gothic and dark-aesthetic wearers, Goth’s jewelry collection includes pieces from independent creators who work in dark motifs, occult imagery, and alternative materials — worth browsing once your lobes are healed and sized.
How do you choose the right initial gauge size for stretching?
Most standard lobe piercings are done at 20G (0.8 mm) or 18G (1.0 mm). If your piercing was done at a professional studio in the last few years, 16G (1.2 mm) is also common. That starting point matters because your first stretch should be only one size up from wherever you currently are.
Don’t assume. Measure first with a caliper or by inserting known-size jewelry. A piercing that looks healed on the surface may still have internal tissue that hasn’t fully matured — most piercers recommend waiting at least 6 months after the original piercing before beginning any stretch, and a full year is safer.
If you’re starting from a standard 18G lobe, your first stretch is to 16G (a 0.2 mm increase). That’s genuinely small, and it should feel like almost nothing. If it doesn’t, the piercing isn’t ready.
How do you downsize or remove ear gauges?
Downsizing is possible at most sizes below about 10 mm (00G), though results vary by individual tissue elasticity, age, how long the lobe was stretched, and how quickly the stretching was done. Lobes stretched slowly over years tend to shrink back more completely than those rushed to the same size in months.
To downsize, insert progressively smaller jewelry over several weeks, giving tissue time to contract at each step. Warm saline soaks and gentle massage with jojoba or vitamin E oil can support elasticity during the process. Don’t expect overnight results — tissue that took a year to stretch may take a comparable period to contract.
Above approximately 10 mm, the lobe’s connective tissue often can’t fully close on its own. Many people at 1/2" (12.7 mm) and above who want to close their lobes opt for surgical repair, which involves removing the stretched tissue and suturing the lobe back together. Results are generally good when performed by a plastic surgeon experienced with lobe repair.
If you’re not ready to commit to permanent closure, simply wearing smaller jewelry keeps the lobe functional and reduces further stretching from gravity.
What the gauge chart doesn’t tell you about stretching
Most gauge charts present size progression as a clean, linear ladder. It isn’t. The millimeter jump between sizes grows as you go up, and that asymmetry is exactly what catches people off guard at larger sizes.
Moving from 16G to 14G is a 0.4 mm increase. Moving from 2G to 0G is a 2.0 mm increase. Both are technically “one size up,” but the tissue strain is dramatically different. This is why the APP’s guidance on slow progression isn’t just conservative advice — it reflects the actual physics of what the tissue is being asked to do.
There’s also a cultural dimension worth naming. Ear gauging carries real historical and community significance, and treating it as a purely cosmetic trend misses the craft involved. The people who do it well — who reach large sizes with healthy, symmetric lobes — typically spent years on the process and took the measurement and material details seriously from the start.
At Goth, the curation philosophy reflects that seriousness. Independent vendors on the platform are expected to list explicit material specs, and the gothic jewelry guides on the site treat material quality as a non-negotiable part of the aesthetic, not an afterthought.
Curated plugs and tunnels for alternative aesthetics
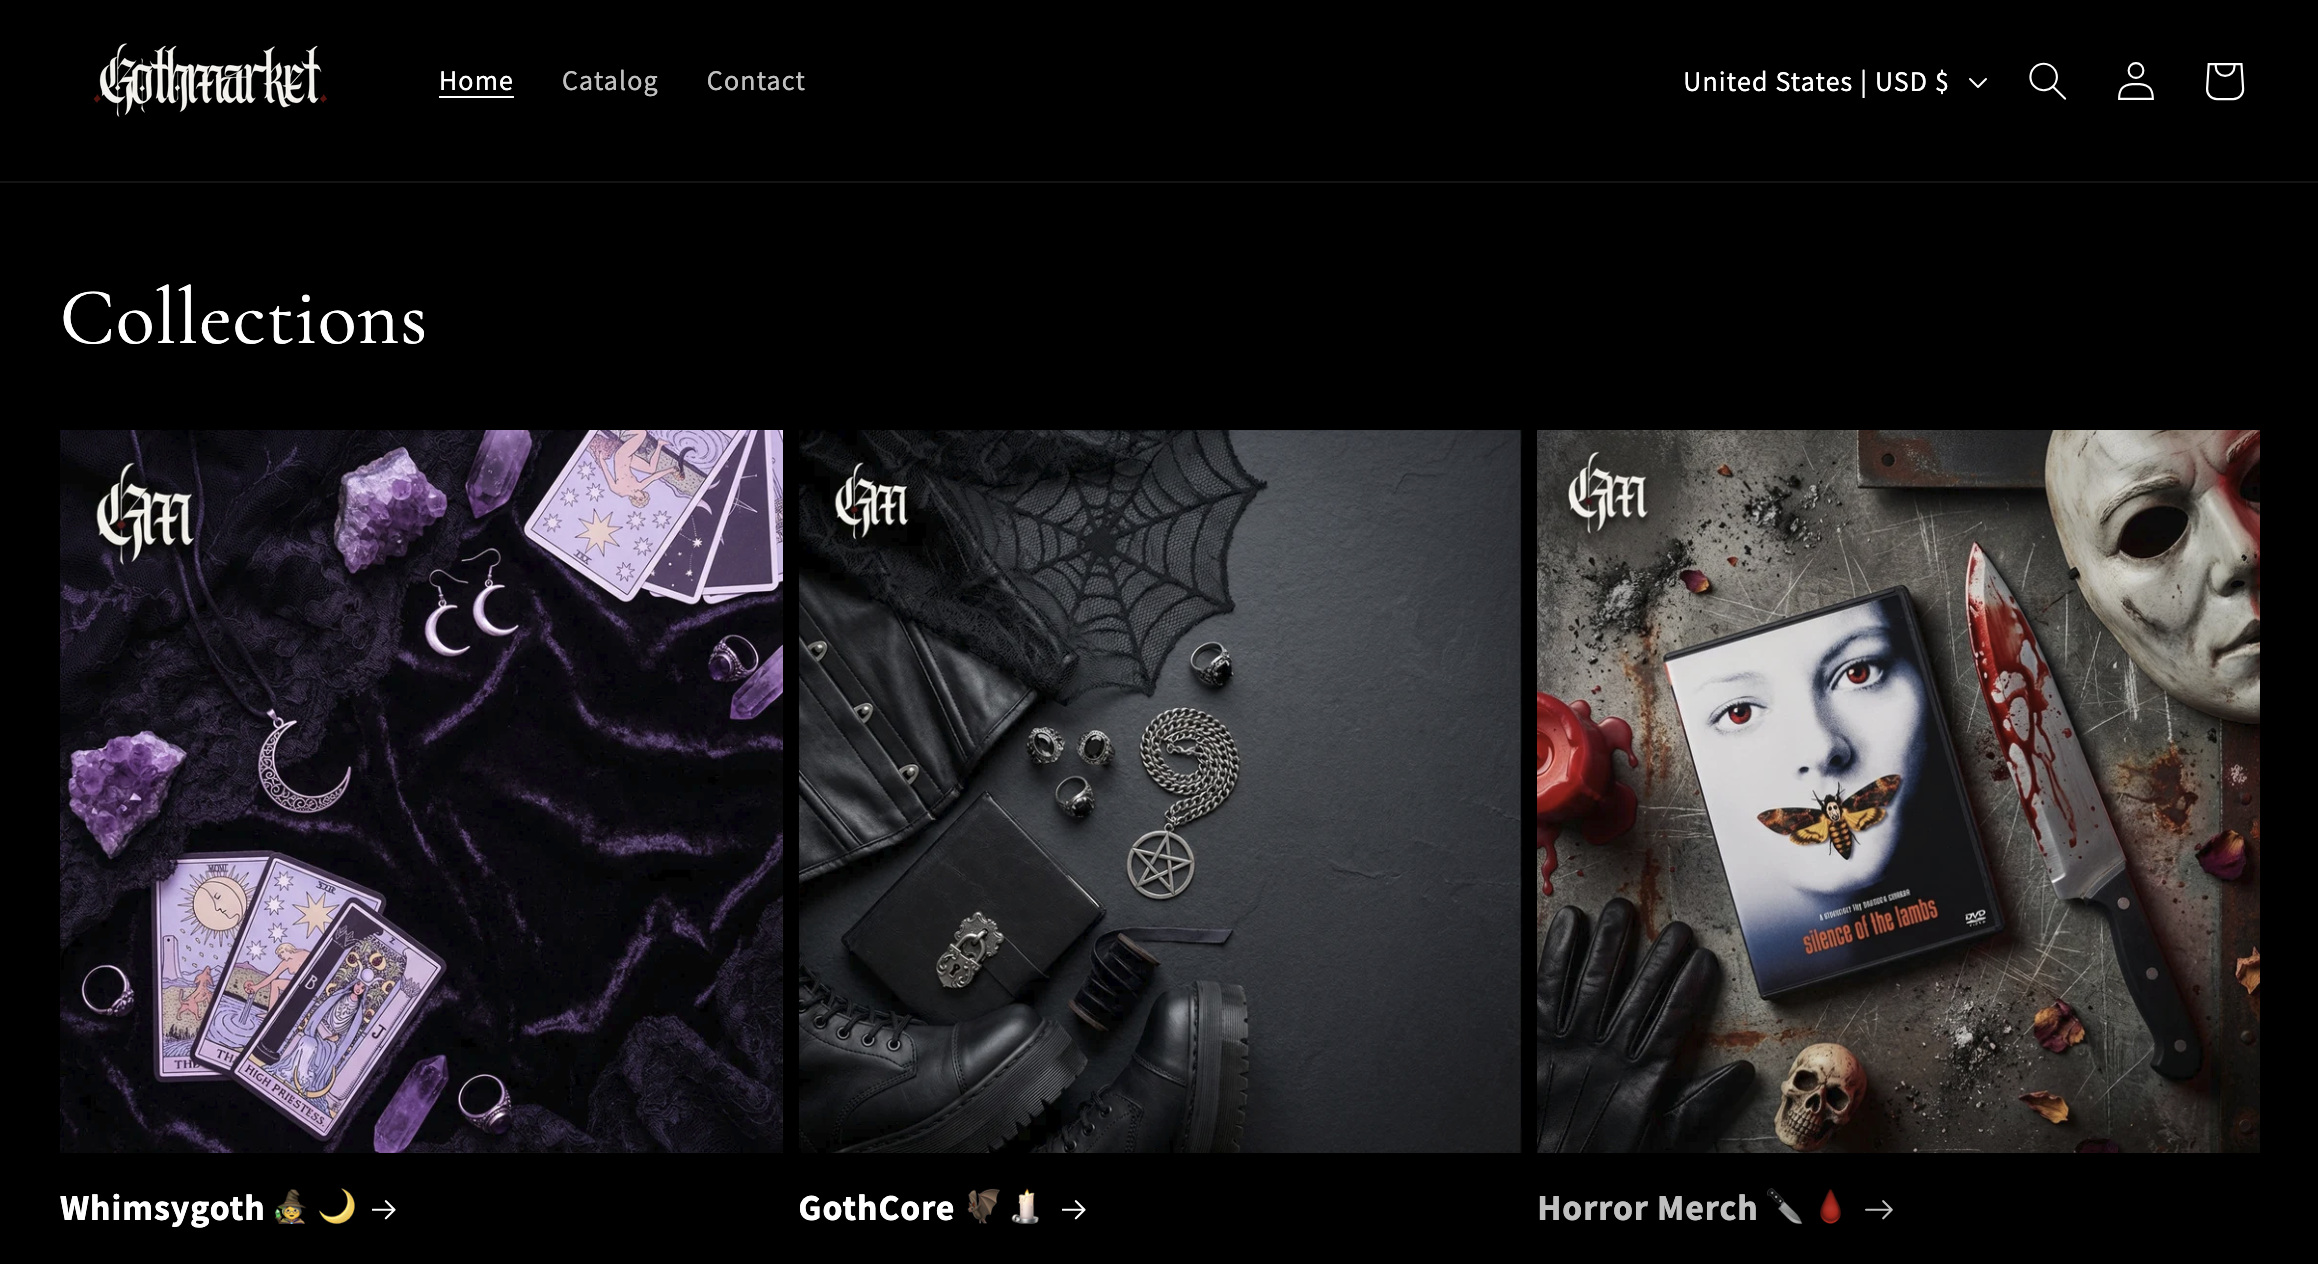
Goth is a curated marketplace built for alternative and dark-aesthetic communities, connecting independent creators with buyers who want something more specific than mass-market body jewelry. The jewelry collection includes plugs, tunnels, and ear pieces from independent makers who work in gothic, occult, and dark-aesthetic styles, with explicit material descriptions so you can verify alloy specs before buying.
Before purchasing, confirm the millimeter measurement matches your current size, check that the material listing includes a specific alloy designation (not just “surgical steel”), and contact the seller directly if you need alloy certification for a sensitive or healing stretch. Use the conversion chart above to cross-reference any gauge label against its mm equivalent. Browse the full collection at Goth and filter by material or style to find pieces that fit both your lobe and your aesthetic.
Sources
The guidance in this article draws on the following primary authorities:
- APP_2017_Stretching_Brochure_final.pdf
- Jewellery allergy
- Body jewelry sizes - Wikipedia
- Ear Gauge Sizes: A Complete Guide (+ Ear Gauge Chart) - wikiHow
This article is general information, not a substitute for advice from a qualified doctor. Consult a qualified healthcare professional about your own circumstances before acting on anything here.
FAQ
What size comes after 00G in ear stretching?
After 00G (10 mm), the gauge system ends and sizes continue in millimeters or fractional inches. The next common size is 7/16" (approximately 11 mm), followed by 1/2" (approximately 12.7 mm), then 9/16" (approximately 14 mm). From this point forward, always verify the explicit millimeter measurement on any product listing rather than relying on a gauge number, since no standard gauge label exists above 00G.
How long should you wait between ear gauge sizes?
Consumer guides recommend waiting at least 4–6 weeks between stretches at smaller sizes (14G through 0G) and 2–3 months or longer at larger sizes. The APP advises stretching only when the piercing is fully healed and shows no tenderness or discharge. Because the millimeter jump between consecutive sizes grows larger as diameter increases, longer waits become more important, not less, as you progress.
What is the gauge size conversion for a standard lobe piercing?
Most standard lobe piercings are done at 20G (approximately 0.8 mm) or 18G (approximately 1.0 mm). Some professional studios pierce at 16G (approximately 1.2 mm). If you’re unsure of your current size, measure your existing jewelry with a digital caliper rather than guessing from the gauge label.
How do you test jewelry for nickel at home?
Use a dimethylglyoxime (DMG) test kit, available at pharmacies and online. Apply one drop of DMG solution to a cotton swab, rub it on the jewelry surface for about 30 seconds, and check for a pink or red stain. A positive result means free nickel is present and that piece should not be used in a healing or sensitive piercing. DermNetNZ recommends this method as a practical consumer screening tool.
Can stretched ears close back up on their own?
Lobes stretched below approximately 10 mm (00G) often shrink significantly when smaller jewelry is worn consistently, though complete closure depends on individual tissue elasticity, age, and how quickly the stretching was done. Above 10 mm, full closure without surgery is unlikely. Surgical lobe repair by a plastic surgeon is an option for those who want to close larger stretches permanently.
What are the safest metals for stretched ears?
Implant-grade titanium (ASTM F136) and implant-grade stainless steel (ASTM F138) are the most widely recommended options. Solid 18–24k gold and borosilicate glass are also safe for healed stretches. DermNetNZ advises avoiding white gold and unknown alloys, which often contain nickel. Always look for a specific alloy designation on product listings rather than relying on unregulated terms like “surgical steel.”